OK, so this guy I actually painted quite a while ago, but for some reason, I didn't think to post him on here. So anyways, here is custom War For Cybertron Optimus Prime.
First off... here's a reference photo for ya. This is Optimus Prime's design from the game, Transformers: War for Cybertron. I decided to paint the figure to match with all the scratches and other damage and grime.
Original unpainted figure. Photo from www.seibertron.com
And here's the custom. As you can see, I added quite a bit of grime and weathering. All brown dirt was done with a wash of acrylic paint and all silver "paint chipping" detail was done with Testers enamel silver.
Right side view. The painted silver section that's attached to the wheel on his back was previously unpainted red plastic.
Unpainted figure. Apparently the gun can be stored on his back... but I never keep it there. Photo from www.seibertron.com
Back view. More of the same detailing as was mentioned before.
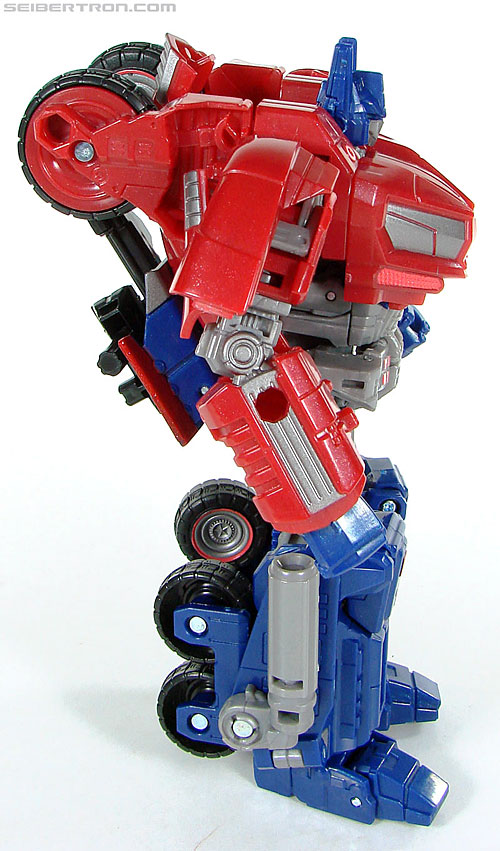
Unpainted figure. Photo from www.seibertron.com
Left side view.
Aside from painting, I also filled in his previously hollow upper legs with Aves Fixit Sculpt.
Add a little paint and it blends right in.
And vehicle mode! I made sure to add even MORE weathering and grime here. Kind of doubt they have car washes on Cybertron. And no, I didn't mod the smoke stacks. They just forgot to rotate them in the previous image.
Front view. I painted the silver sections in the lower front to be more game-accurate. Previously unpainted red plastic.
Unpainted figure. The gun can be stored on the back of the vehicle as seen here. Photo from www.seibertron.com
Left side view. Same detailing as on the other side.
Unpainted figure. Photo from www.seibertron.com
Back view. Same general detailing. However, I did add the glowing interior to the smoke stacks. Previously unpainted grey plastic. And again, I did not mod the tail lights. The pieces were supposed to be flipped in the previous image.
Unpainted figure. The gun can attach to a port on the back of the truck. Photo from www.seibertron.com
Painted.
Closeup on Optimus Prime's gun. It was previously completely unpainted black plastic. So I painted on the metallic finish as well as the pink lights and red detailing.
Front view.
Side view.
Top view. That flap on the side is there because the gun is able to be folded in half and the flap locks it in place.
Optimus brandishes his weapon.
Now, Optimus has a hole in the side of each of his arms. This is to plug in his weapons for arm-mounted weapon combat.
Like so. Here, his gun has been plugged into his arm. This is similar to how, in the game, the Transformers' arms would actually transform into their weapons.
Optimus with an arm-mounted blaster.
Now, the blaster is nice, but in the game (as well as the tv series) Optimus also had an axe. Unfortunately, Hasbro never made one for the figure. There is a third party company that made one, but it's a bit expensive. So, being the poor fellow that I am, I decided to make my own.
First off, here's a reference photo of the third party axe weapon. I used this photo to create my custom. I didn't make it exact, but it's design is fairly close since that's the design of his axe in the game.
First, I got out my sheet of styrene and drew the axe outline on it in sharpie. And yes, I did draw this freehand.
Then, I used the dremel with a saw attachment and cut it out along with various other bits. Above is the cutout piece of styrene.
Next, I drew an outline of the raised edging for the axe on a thinner sheet of styrene. I did this twice, so that I would have a raised edge on each side of the axe blade.
And here's the cutout edging. I also doubled up the rectangle in the center so that it would be that much higher and give the whole thing a bit more detail..
Other side of edging.
Now, here we have the styrene blade with the edging attached. As well as some... uh, rhinestones? I think that's what they're called. Oh, and I've also filled in the sides of the edging with Aves Fixit Sculpt to fill it out. The Fixit Sculpt was also used to sculpt the cone on the top of the axe.
Then I painted it. The blades were painted with Tamiya translucent paint (a mix of red and yellow) with a bit of a darker shade dabbed along the inner edge. The rest was painted solid flat black, then dry-brushed with Testers enamel silver. The handle you see here, is actually a plastic straw. They are sturdy plastic silly straws and are exactly 5mm, which is the exact size for most Transformers hands. You can buy them at Walmart for $1.75 and they come in packs of 8.
Since Optimus has the side arm holes, I decided to make a second handle on the side so it could be arm-mounted.
Oh, and the striped ring (yellow in this image) at the top of the handle (base of the axe) is actually an old Super Glue cap that I cut apart. I use Super Glue for all my custom modeling work.
I accidentally broke the blade off the handle, so I went back in and re-glued it as well as adding more Aves Fixit Sculpt to strengthen the base of the blade. This also allowed me to sculpt the small ring shape on the side, which I had forgotten to do earlier.
So here it is all painted and finally finished. You might notice that I skipped out on painting in all the white data lines that the third party weapon has on the blade. I was going to add them, but since it's translucent paint, I didn't want the solid white lines turning black when it's illuminated from behind.
Other side. Same details.
So here it is in Optimus' hand. A perfect fit! Those silly straws work so well!
And here it is mounted on his arm.
No slippage, looseness, or anything like that on this weapon.
Optimus showing off his prized battle axe. Custom made out of styrene, silly straws, and rhinestones. haha